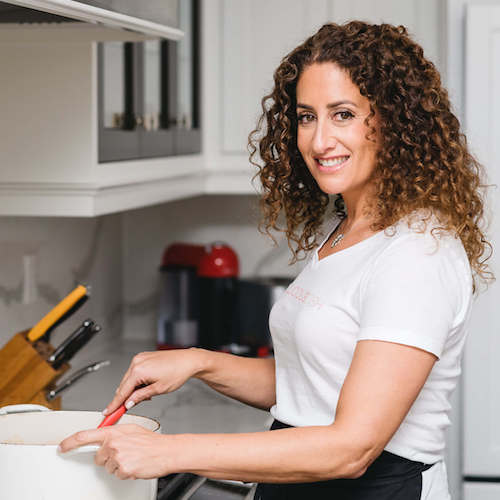
I found my bliss in the kitchen. My bliss continues by making people feel happy in the kitchen.
Often, my clients tell me that they feel most relaxed when they’re cooking or baking.
But, not everyone feels that way. Some people feel stressed at the thought of turning on the oven. Sometimes, the prospect of making dinner, planning a menu, shopping, meal prepping and then putting the whole thing together without losing your finger (or your sanity) is foreign.
I am an occupational therapist (OT) by training, which equipped me with the ability to help people adapt to their environment. (Although I paused my OT career in its infancy and had twins, then very shortly after — a third child.)
Apart from raising three babies, during this transitional time I was looking for a work project. But, I was not ready to go back to being an OT at the hospital. At this point, I was loving cooking a ton, while testing and writing new recipes. Eventually, it dawned on me that opening a cooking school would be a perfect “temporary” fit for me.
Well, one thing led to another and Delicious Dish, my bliss was born! I never went back to OT, and 21 years later I’m still discovering new blissful moments every day.
When COVID-19 hit in March 2020 and the world closed, I had to cancel all of my cooking classes. Like so many others, I felt a terrible and sudden loss as I am the type of person who loves teaching others. I thrive in a community, and with more people than ever in their kitchens than ever during this time, I knew I needed to lend a hand.
While everyone was trapped quarantining at home, many people began cooking meals consistently for themselves or their families for the first time. People were struggling making meals every night while I was having fun doing so. Something needed to change, and I still longed for the joy of aiding people. So, I went live on Instagram and taught a totally free cook-together class at 5pm every day for 2 months. But I had bills to pay, so the free Instagram cooking classes evolved into the virtual cooking school that I am running today!
A whole new world opened up. I began getting clients from all around the world, in different time zones and from all different ages and backgrounds. This new reach helped me realize that what I love most about this career is the ability to share what I love with other people.
I set up the classes so that you can view the class schedule, plan weekly meals based on the class menus, shop using the grocery lists provided, and cook dinner together several times a week. The prices are affordable, the classes are short, and you have dinner on the table soon afterwards. Quick, easy, affordable - what could be better than that? My clients seem to agree, with many taking several classes a week. The experience of cooking dinners together-while-apart has grown Delicious Dish into a larger, yet even closer community than ever before.
The virtual world of cooking classes truly fed and continues to feed this need for me. It allows me to reach out and solve my client’s cooking needs. Delicious Dish has become a true online community. Similar to a workout class, people make it part of their weekly routine.
Delicious Dish teaches everyone and offers many different classes. Some fun themes include Teen Cooking Bootcamp as an after-school program, where teens make a full and delicious meal for the family. Those teens eventually go off to university where they can take the popular University Cooking 101 class and get ready for their first kitchen. I teach students how to set up their kitchen and how to prepare healthy dishes.
Other fun programs include Kill-it with the Skill-et for healthy and delicious skillet and sheet pan meals for busy families. The Monday Night Cooking Series is where we cook using pantry ingredients, perfect after a weekend and a possibly bare fridge. Make Ahead Friday Night or Dinner Party happens on Thursdays so that you can have your party on the weekend and relax because it was done on Thursday!
I am proud to say that people tell me that I single-handedly taught them to cook, that they love being in the kitchen, and that they now feed their families with confidence and ease. For the past 21 years, my recipes, tips, and instructions have been in kitchens helping people cook and enjoy doing it.
My grandmother taught me that there is no better place or way to gather friends and family than around the dining table. I grew up in a family that believed home cooking was paramount and an essential life skill. Tradition was of utmost importance, and whether it was a Jewish holiday dinner, a get-together with friends, or a celebratory meal, food helped feed almost every tradition.
I find that when I take a break from classes, I end up having dinner parties. I can’t seem to get out of the kitchen. I love to create, taste and present. Moreover, I have a need to inspire others to explore and enjoy it, too.
This is my bliss. Let’s meet up in the kitchen and make delicious happen!
Here the recipe for Carolyn’s turmeric Greek chicken skewers, spinach pizza and sushi bowl! Check out our 100th episode to hear Carolyn give all the details all about these tasty meals and try them for yourself!
Turmeric Greek chicken skewers
This is probably my all time favourite chicken marinade. It never gets boring and everyone loves it. Pairing it with a chopped salad make it a perfect and complete meal.
Ingredients
For the Chicken:
- ⅓ cup freshly squeezed lemon juice
- ⅓ cup extra virgin olive oil
- 1 Tbs. Kosher salt
- Pepper to taste
- 1 Tbs. dried oregano
- ¾ tsp. turmeric
- 1 tsp. paprika
- 3 cloves garlic, minced
- 1½ -2 lbs boneless chicken breast or thighs, cut in large chunks (or leave the chicken whole
- 8-12 metal or wooden skewers (if you use wood skewers, soak them first), or do not use skewers at all
Directions
For the Chicken: Combine the lemon juice, olive oil, salt, pepper, oregano, turmeric, paprika and garlic in a zip top bag. Add the chicken. Let marinate for 2-3 hrs. If you would like to marinate it longer, only add the lemon juice 1-2 hrs before cooking the chicken. If you have time, marinate the chicken overnight and bring the chicken to room temp 1 hr before grilling. You can add the lemon juice while bringing the chicken to room temp for that hour*.
When ready to grill the chicken, heat grill to high or put your oven to 450˚F. Put 4-5 chicken pieces on each skewer (if you are using skewers).
Grill the chicken on medium. Turn after 4-5 minutes or when the chicken releases easily from the grill and golden grill marks have formed. Grill on 3-4 sides (total about 10-15 minutes). If cooking the chicken in the oven, place the chicken skewers on a foil lined sheet and bake for 15-20 minutes. Serve hot or room temperature.
Serves 6
*the lemon juice “cooks” the chicken a little and that is why you don’t want to add it too early.
Spinach, goats cheese and garlic confit pizza
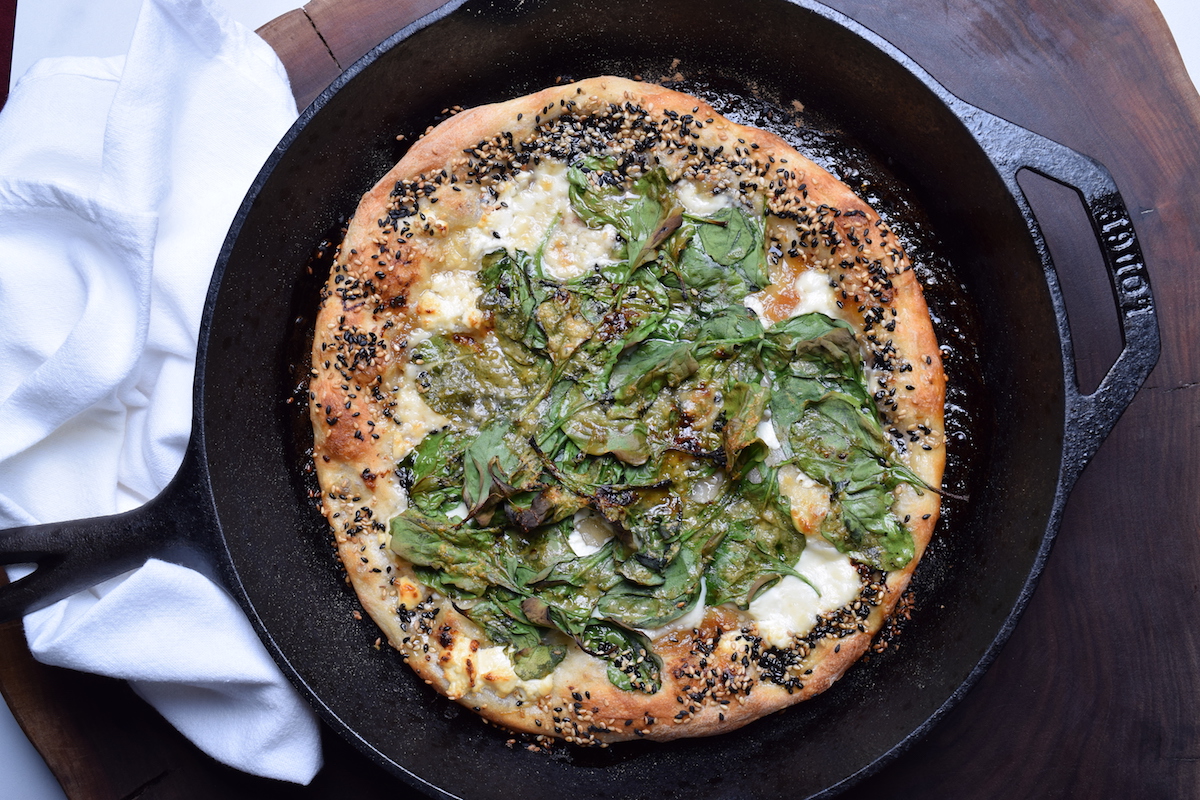
The combination of goats cheese, spinach and caramelized garlic (or garlic confit) makes this pizza irresistible. Garlic confit takes a while to make but totally worth it; and having a batch on hand makes everything better!
Ingredients
- About 8oz/225g pizza dough, room temp for 1-2 hours*
- Flour or cornmeal for sprinkling
- Oil from the garlic confit or olive oil for drizzling on the dough
- 2-3 cloves Delicious Dish Garlic Confit
- 2-3 oz/60-90 g fresh mozzarella, sliced or cut into ½-inch cubes
- 2-3 oz/60-90 g soft goat cheese, crumbled
- 4 cups loosely packed baby spinach
- 1-2 tbsp freshly grated Parmesan or Grana Padano cheese
- 3 tbsp honey
- 2 tbsp sesame seeds
- Flaked sea salt
Instructions
Place a pizza stone or a 10-12-inch cast-iron skillet or a round or rectangular sheet in the oven on the second-from-the-bottom rack and preheat the oven to 500˚F. In the meantime, slowly stretch your dough into a round or rectangle (about 12 inches or a little bigger than the skillet) and leave it on the counter.
When the oven and pizza vessel are hot, carefully remove the stone or skillet from the oven. Sprinkle the sheet or skillet with a bit of flour or cornmeal. Then, carefully place the dough into (or onto) the pan, being careful not to burn your fingers. Press the edges of the dough up on the sides of the pan so you get a good crust and so the pizza doesn’t retract into the pan (if you can, you may not be able to).
Drizzle some of the oil from the garlic confit (or regular olive oil) over the pizza dough. Using the back of a spoon, spread the soft garlic confit evenly over the dough round, leaving a ½-inch border.
Evenly top the pizza with the mozzarella, goat cheese, spinach and Parmesan or Grana Padano cheese.
Drizzle most of the honey on the crust and a little on the pizza itself. Sprinkle the sesame seeds on the crust with flaked sea salt.
Place the pizza in the oven and bake for 10-15 minutes or until the cheese has melted and is golden brown in spots.
Using 1 or 2 offset spatulas, remove the pizza and transfer to a cutting board. Cut the pizza into 6 slices and serve immediately.
Makes 1 10-12 inch pizza.
*I buy pre-made raw pizza dough from my local grocery store.
General instructions for grilling a pizza
You can grill any pizza that you normally would put in the oven. Just remember, you are placing the toppings on the “second” side. Note: A successful grilled pizza belongs to the organized, so have ALL of your tools and toppings with you at the grill.
Instructions
Prep the dough: I buy raw dough from my local grocer, I find it in the refrigerated section. You must, and I mean MUST, make sure that the dough is at room temperature for an hour or so before you start grilling. Then, on your work surface, I use my countertop, the dough should be stretched or rolled out into a thin circle or oval, basically any shape that is easy to pick up. Don’t make the pizza too big; rather, make two smaller pizzas. I like to have a thin centre and a nice thick crust.
Heat the grill: Every grill is different; mine has a temperature gauge. I get it to about 550˚F before I start.
Gather your ingredients and toppings: Make sure you have easy access to your ingredients because you will be topping the pizza when the dough is on the grill, and you will need to work fast! I place every-thing on the shelves attached to my grill. If you don’t have that, set up a table or bench next to the grill.
Get your tools handy: You will need a spatula, tongs, a spoon (for the sauce), a brush (for the oil), an oven mitt and a towel.
Oil the dough: Lightly flour a piece of parchment paper, tray or cutting board. Remove the stretched dough from your work surface and place it on the floured parchment paper, tray or cutting board. Take it out to the preheated grill. Brush one side of the dough with olive oil; this is the side you will lay down on the grill.
Grill the pizza: Open or take the lid off the grill. Lay the dough round on the grill with the olive oil side down. Then brush the top of the dough with a thin layer of olive oil. Grill the first side for about 2-3 minutes with the lid off, checking the underside every so often by lifting it with tongs. You want it lightly golden and just cooked, not charred.
Now for the toppings (that are right beside you!): Flip the dough over with the tongs or spatula and top that ‘zzz fast! Spread on a thin layer of sauce, pesto, garlic confit or caramelized onions, some cheese, and whatever toppings you fancy. Don’t go overboard—if it’s too heavily loaded, the pizza won’t cook well.
Cook the pizza: Put the lid on and cook for 3-5 minutes. Check it a couple of times; the cheese needs to be bubbling and the crust golden brown, crisp and well done.
Remove the finished pizza: Lift the lid and drag the pizza off with the spatula or tongs. Let cool for 3 minutes, then cut into pieces and eat!
Brown rice sushi bowl with sweet and crispy salmon
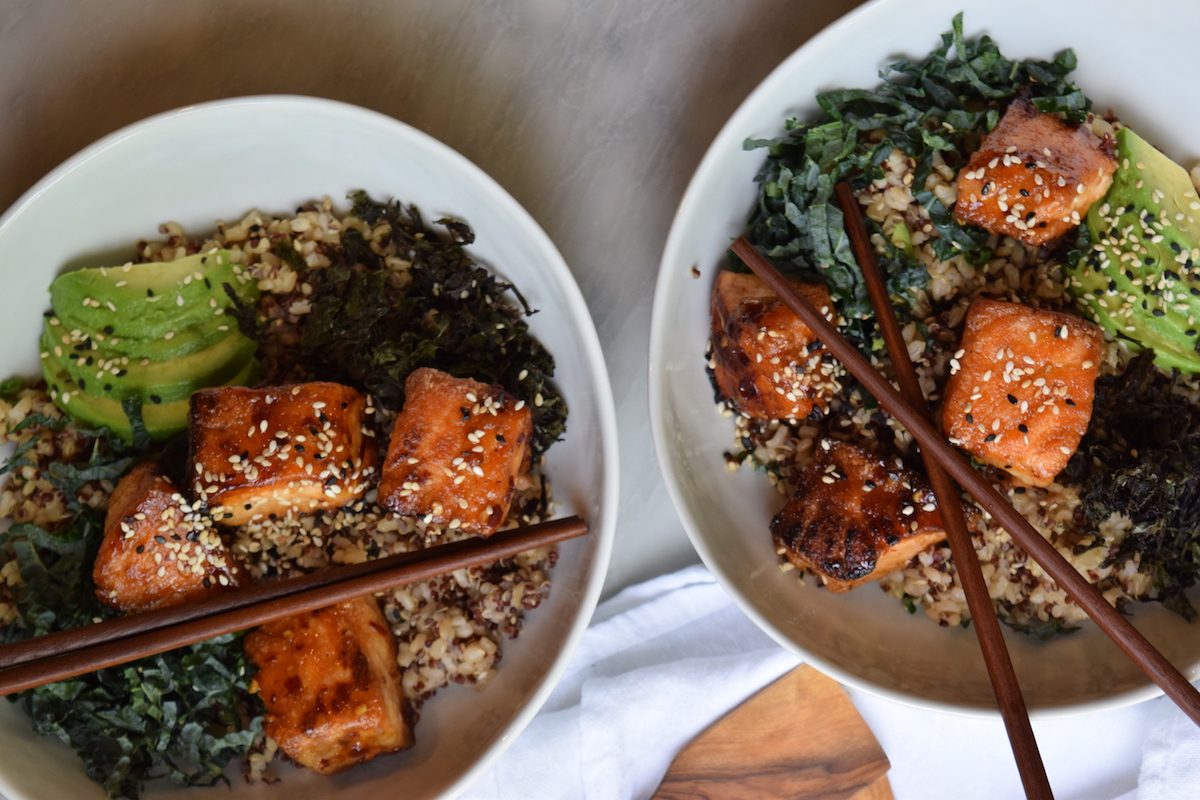
This is a one-bowl meal that you will crave! All the food groups are here, so you can feel amazing about eating this. Here’s one of my best “bowl” recipes.
A few things about this recipe: While it looks a little daunting, it can be broken down into a few easy components.
The Rice: You can use a basic rice - it doesn’t have to be a mixed rice. I just think that mixed rice looks so pretty, I couldn’t resist! The Fish: just do it - it’s fantastic!! The Veggies: I simplified this step by throwing the raw kale into the pot with the cooked rice immediately after the rice is cooked and still super hot. This will steam the kale and avoid you having to use a separate pan to cook the kale. Skip the nori or seaweed if you can’t get it. But it’s so healthy – so that’s why I’ve included it. Plus, it puts adds a “sushi” influence into this bowl.
Ingredients
- 1 ½ cups brown rice
- ½ cup red quinoa or white
- Chili Sauce
- ½ cup water
- 5 tbsp. maple syrup
- 3 tbsp. apple cider vinegar
- 3 cloves garlic, chopped finely
- 3 tbsp. low sodium tamari or coconut aminos
- 1 tbsp. chili flakes
- 1 tsp. cornstarch or arrowroot powder
- 1 tbsp. water
- 1 lb salmon, skin removed and all brown fat removed from underneath
- 2 tbsp. rice vinegar
- 2 tbsp. low sodium tamari or coconut aminos
- 2 tsp. sesame oil
- 1 cup shredded kale
- 1 cup nori crinkles
- Toasted sesame seeds
- 2 green onion, sliced into rounds
- ½ of an avocado, sliced
Directions
Make the rice: Rice Cooker Method: Cook brown rice and red quinoa in the rice cooker at the same time on the white rice setting and water measurement line. Stovetop Method: In a saucepan. Bring 4 cups water and a large pinch of salt to a boil. Add the rice, lower the heat, and cover the pan. Simmer for 20 minutes (it will not be tender). Tip the quinoa into the rice, re-cover the pan, and continue cooking for 20 minutes, or until the rice and quinoa are both tender. Total simmering time is 40 minutes.
In the meantime: Make the Chili Sauce. In a small pot heat the water, maple syrup, apple cider vinegar, garlic, coconut aminos, and chili flakes. Bring to a simmer and cook for 5 minutes. In a small bowl mix together the cornstarch and 1 tbsp. water until the cornstarch has dissolved. Pour this into the hot chili garlic sauce, stir, and let boil for 10 additional minutes. Turn off the heat so it will thicken. It will keep for a week or two.
In the meantime, marinate the salmon. Cut the salmon into large cubes (about 2 inches). Toss with the rice vinegar, coconut aminos and sesame oil.
As soon as the rice and quinoa mixture is ready, open the lid of the rice cooker or pot and place the shredded kale on one side of the pot and place the nori crinkles on the other side. Close the lid of the rice cooker or pot, and let steam for 10 minutes.
In the meantime, cook the salmon: Remove the salmon from the marinade and pat dry. Coat the cubes in arrowroot flour and shake off the excess. Heat a large frypan over medium-high heat. Add oil. Add the salmon cubes, cook undisturbed for 3-4 minutes, flip each piece to the opposite side and repeat, flip the cubes to one more side, cook for 1-2 minutes, flip again, cook for 1-2 minute. Add 4 tbsp. of Chili Sauce to the hot pan with the salmon, let it bubble tossing the salmon cubes in the sauce.
To Serve: Spoon 1 cup rice and quinoa mixture into each bowl, top with salmon cubes, steamed kale and nori. Sprinkle with sesame seed, green onion and avocado.
Serves 2-3.
We’d love to hear from you! Please send us your suggestions for future articles. And if you’re a writer, please see our writer’s submissions page for details.